Manage profile in your macOS desktop app
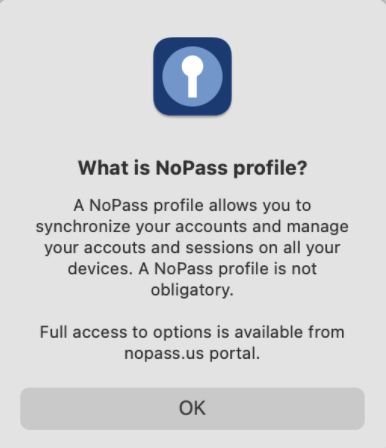
In your NoPass™ macOS desktop application, you can perform the following actions with your NoPass™ profile:
- create a profile
- sign in to the profile registered on other devices
- recover your profile
- sign out from your profile
- delete your profile
For more information on the profile, go to Profile.
Create a profile in your NoPass™ desktop app
You can create your profile in the NoPass™ desktop application using either your email address or your social media login as well as Apple ID.
Creating a profile with your email address
Procedure
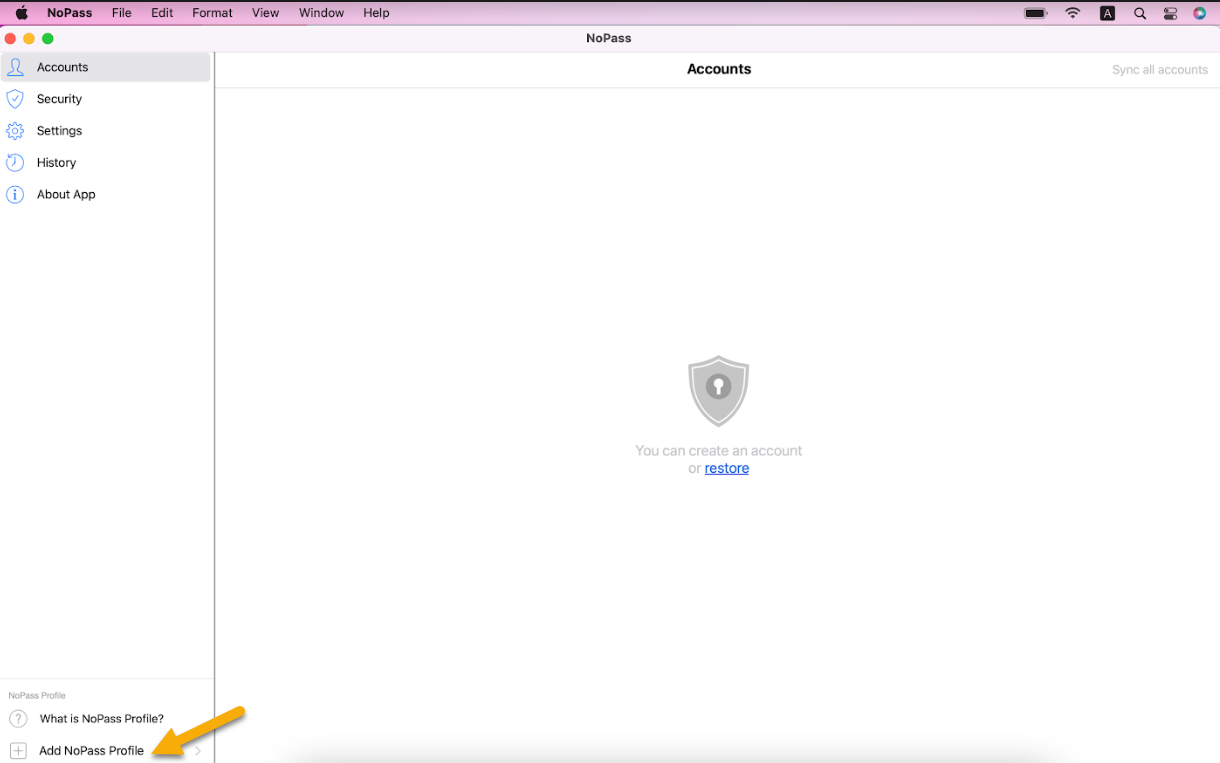
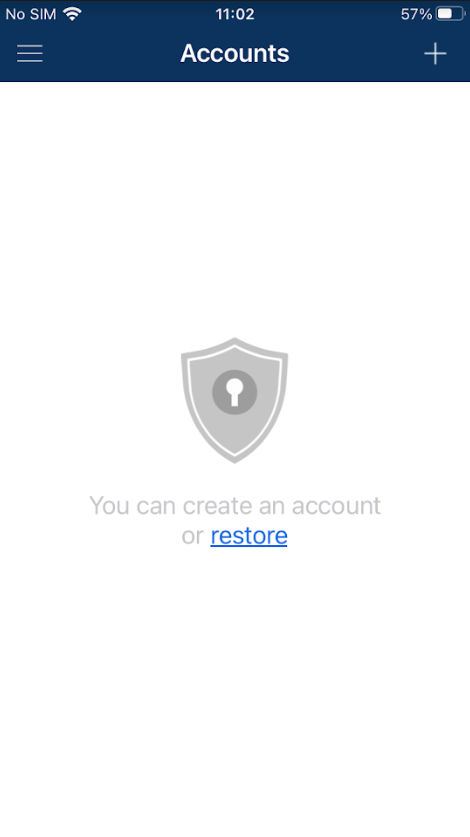
1. Open the NoPass™ application on your macOS computer. Click Add NoPass Profile.
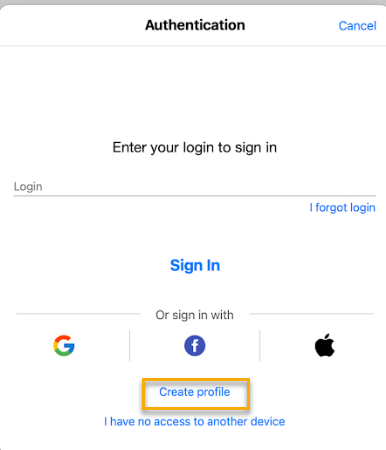
2. On the Authentication screen, click Create profile.
3. On the Registration screen, fill in the Email field, perform one of the following actions, and click Continue.
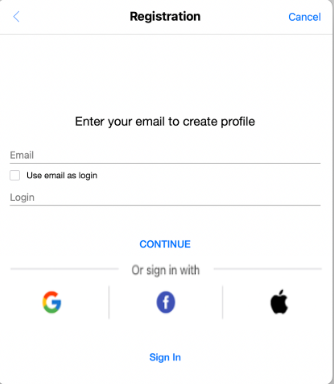
- In the Login field, enter a unique login.
- Select the Use email as login check box.
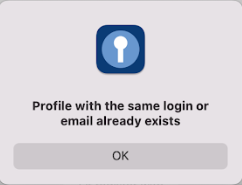
4. In case such a profile has already been registered, the following notification is displayed.
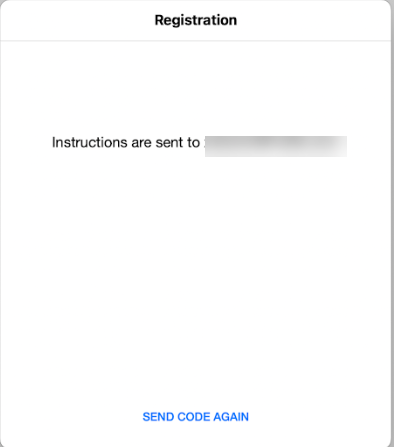
5. Otherwise, the registration link is sent to the specified email address.
6. To complete the procedure of profile creation, perform one of the following actions.
- Open your email message on the device you are using and click the registration link. The following notification is displayed.
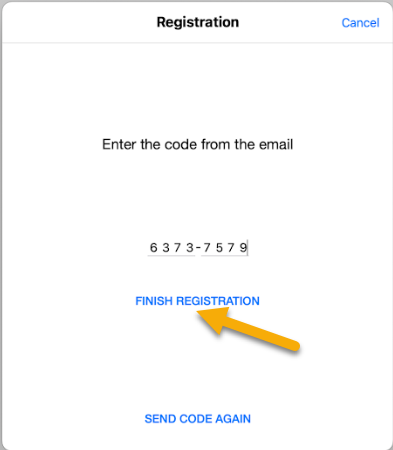
- Open your email message on another device with NoPass™ installed and enter the registration code. Then, click Finish registration.
7. If you have entered the wrong registration code, you will receive the following notification.
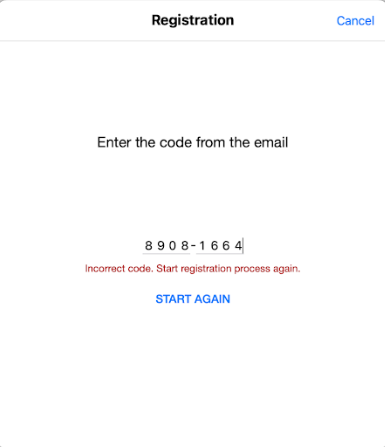
8. After you click Start again, you are redirected to the Registration page. On the Registration screen, check the email address and click Continue to proceed with the registration process.
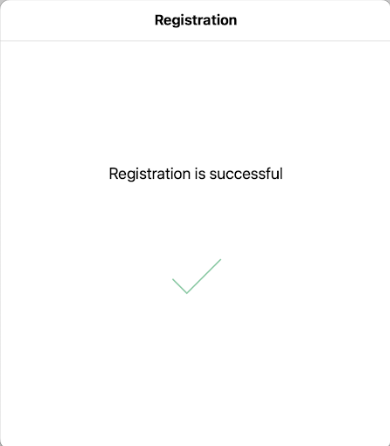
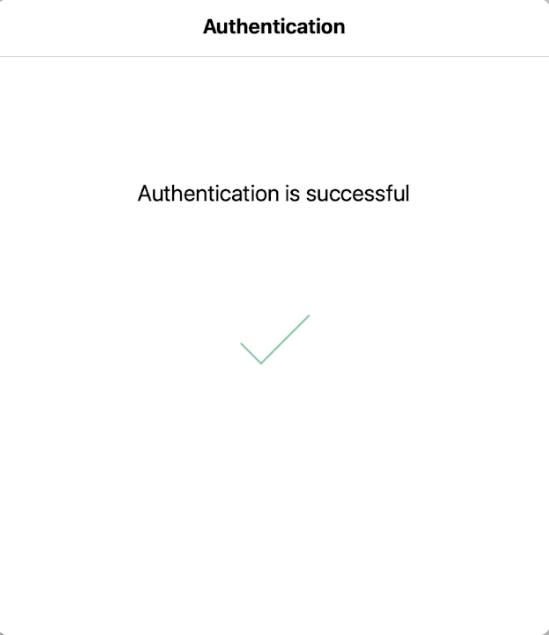
9. After the successful registration, your profile is added to your NoPass™ desktop application.
Sign in to your profile on your NoPass™ desktop app
If your profile is already created, you can sign in to your profile in your NoPass™ desktop app. You can sign in to your profile using either your NoPass™ login or your social media login.
sign in to your profile using your nopass™ login
Procedure
1. Open the NoPass™ application on your macOS computer. Click Add NoPass™ profile.
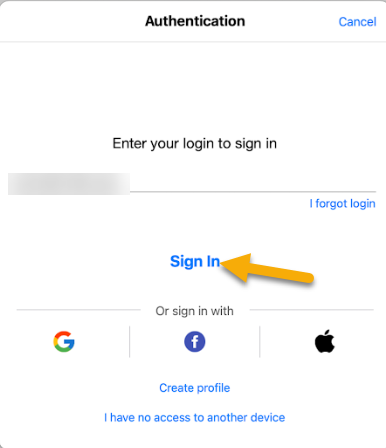
2. On the Authentication screen, enter your email and click Sign in.
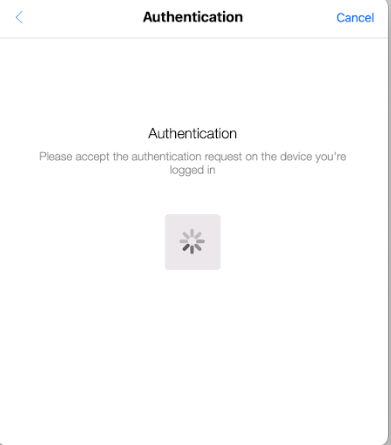
3. The authentication request is sent to your other device.
4. Depending on whether you are signed in to the NoPass app on your other device, perform one of the following procedures.
You are signed in to the NoPass app on your other device
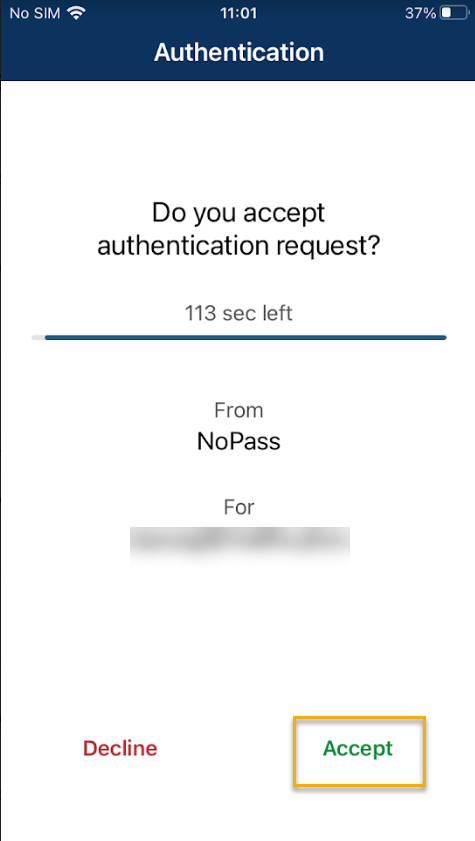
1) The authentication request is sent to your other device.
2) On your other device, tap Accept to confirm your authentication attempt.
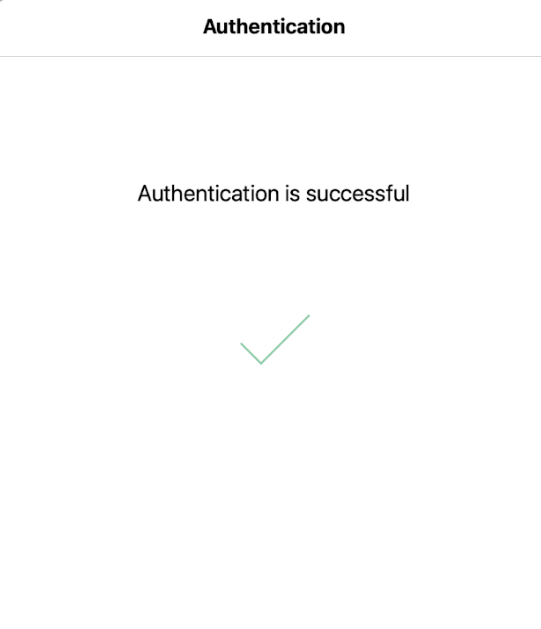
3) After you click Accept on your other device, the NoPass™ profile authentication is completed.
4) If you tap Decline in your push notification on your other device, the Authentication canceled notification is displayed.
5) In your other device, you are asked to provide the reason for declining by filling in a short survey.
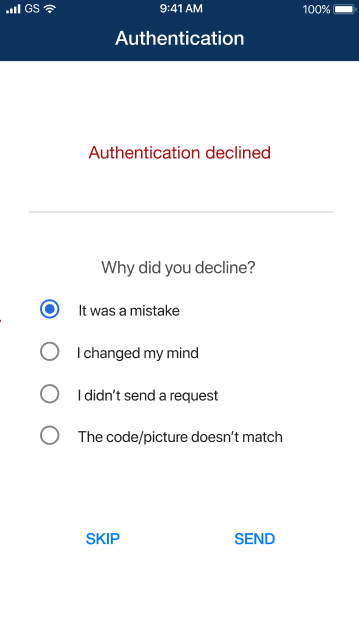
6) After you fill in the survey, click or tap SEND. Otherwise, click or tap SKIP.
You are not signed in to the NoPass app on your other device
1) The following notification is displayed:
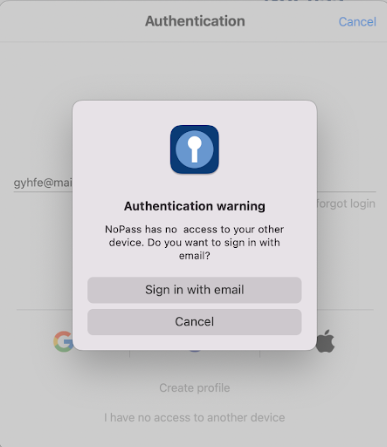
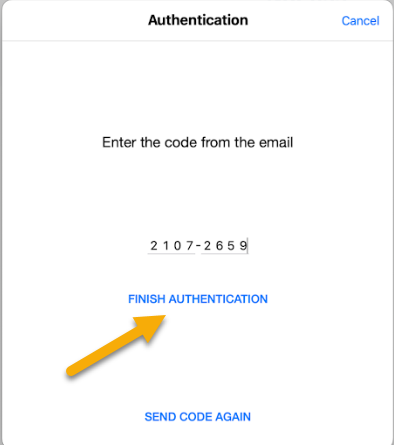
2) Click Sign in with email.
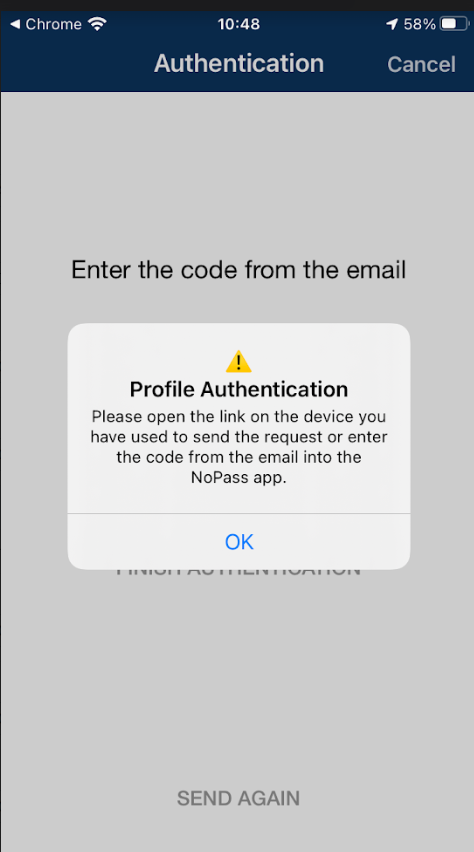
3) Enter the code from the letter sent to your email address on your authentication screen and click Finish authentication.
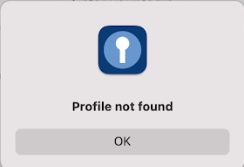
5. If you have no NoPass profile registered, the following notification is displayed.
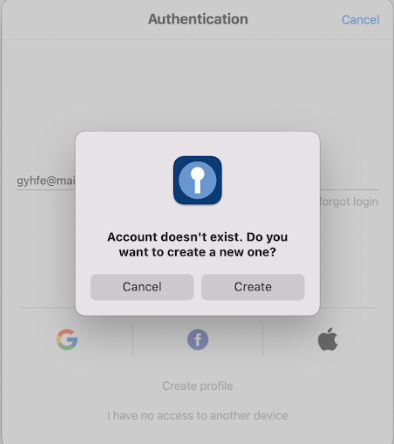
6.To register your NoPass™ profile, click Create and follow the registration procedure from the Create a profile in your NoPass™ desktop app section above.
7. If you don't remember your login, click I forgot login on the Authentication screen.
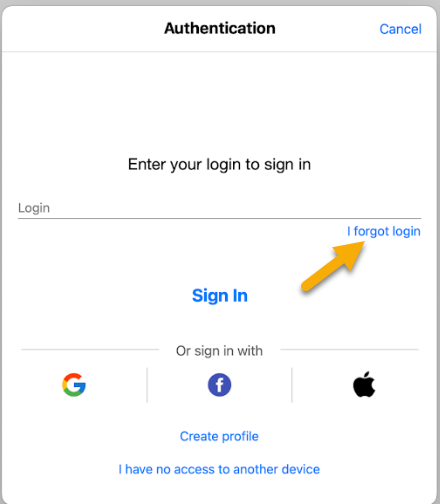
8. The following notification is displayed.
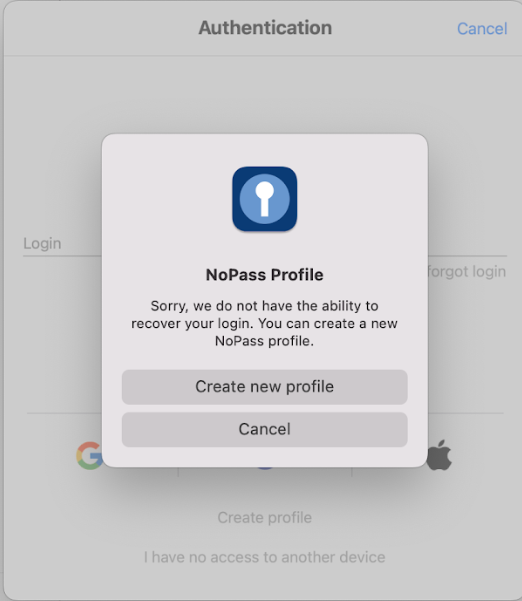
9. To register your NoPass™ profile, click Create new profile and follow the registration procedure from the Create a profile in your NoPass™ desktop app section above.
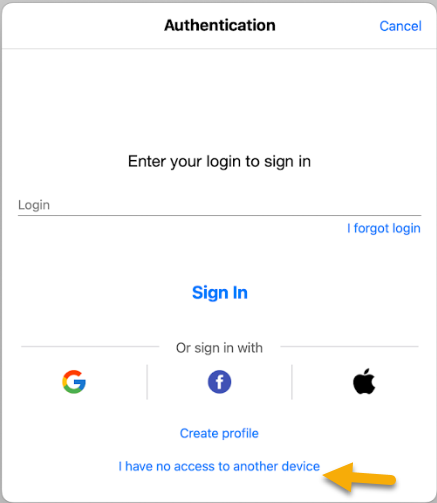
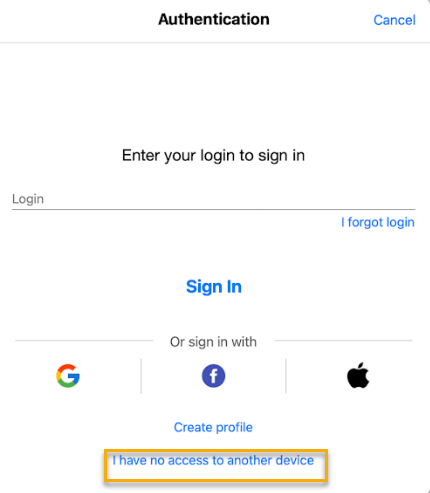
10. If you don't have access to any other device with the NoPass app installed, click I have no access to another device on the Authentication screen.
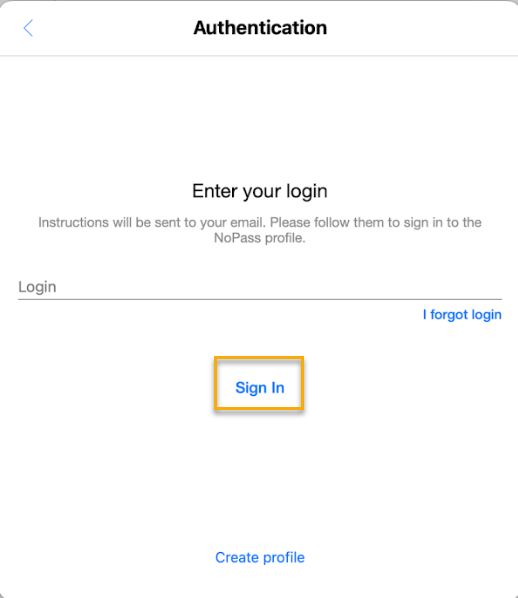
11. Enter your email address in the following screen and click Sign in.
12. In case the email address is incorrect, the following notification is displayed.
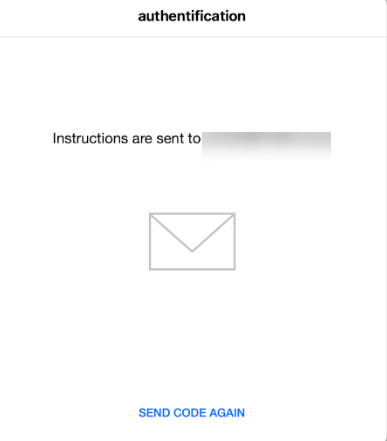
13. If the email address is correct, a letter with authentication instructions is sent to it. Enter the code from the letter on your authentication screen and click Finish authentication.
Recover your profile
The profile recovery is required when you are signed out from your profile on all of your devices with NoPass installed. You can recover your NoPass™ profile on the same desktop application even if your other device is unavailable or cannot receive push notifications.
Procedure
1. On the Authentication screen, click I have no access to another device.
2. To receive the registration link and code, enter your email and click Sign in.
3. The registration link and code are sent to your email address. In case the email address is incorrect, the following notification is displayed.
Depending on the device where you open the email message, the following options are available.
you open the link ON another desktop
Procedure
- If another desktop has the NoPass™ app installed:
1. Click the link from the email message on another desktop. The following notification is displayed in the browser on another desktop.
2. After the browser on another desktop closes, the following notification is displayed.

3. After the error message is closed, you are redirected to the Accounts screen on another desktop, but you are not signed in to your NoPass™ profile.
- If another desktop has no NoPass™ app installed:
Click the link from the email message on another desktop. The browser page with an error message is displayed.
you open the link on your mobile device
Procedure
1. Open the email message on your mobile device.
2. Tap the link in the message. The following notification is displayed:
3. After you click OK, you are redirected to the Accounts page.
You are not signed in to your NoPass™ profile on your mobile device.
you open the link on the same desktop
Procedure
1. Open the received email message and click the link. The following notification is displayed.
2. After the browser page closes, the NoPass™ app opens on your desktop with the following notification.
Now you are signed in to your NoPass™ profile.
Your registration link has expired
1. When your registration link has expired, the following notification is displayed:
On your mobile device In the browser on your desktop computer
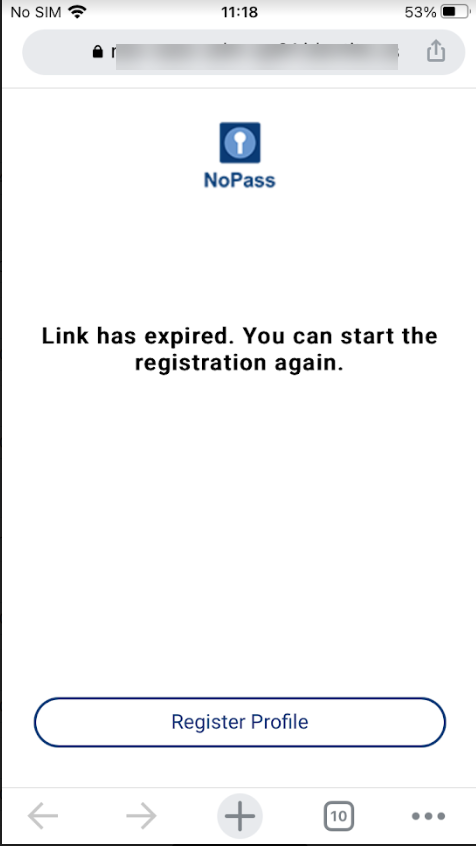

2. To create the new profile, tap or click Register profile on your device and complete the procedure of profile registration in your browser. For more details, see Create Profile without QR.
you enter the code from any device
Procedure
1. Open the email message on any device.
2. Enter the 8-digit code in your NoPass™ application and click Finish authentication.
3. After you receive the notification on successful authentication, your profile is recovered in your NoPass™ desktop app.
4. To warn you of the possible hacker recovery attempt, a notification is sent to your other device.
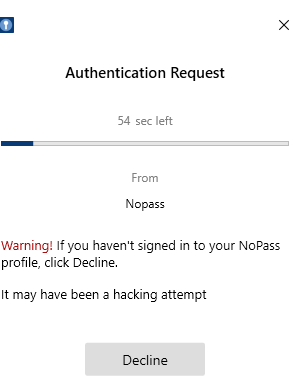
5. Tap Decline on your mobile device to prevent the authentication that was not requested. Then, your profile recovery is canceled and a respective notification is sent to your email.
Sign out from your Profile
If you are not planning to use your profile, you can sign out.
Procedure
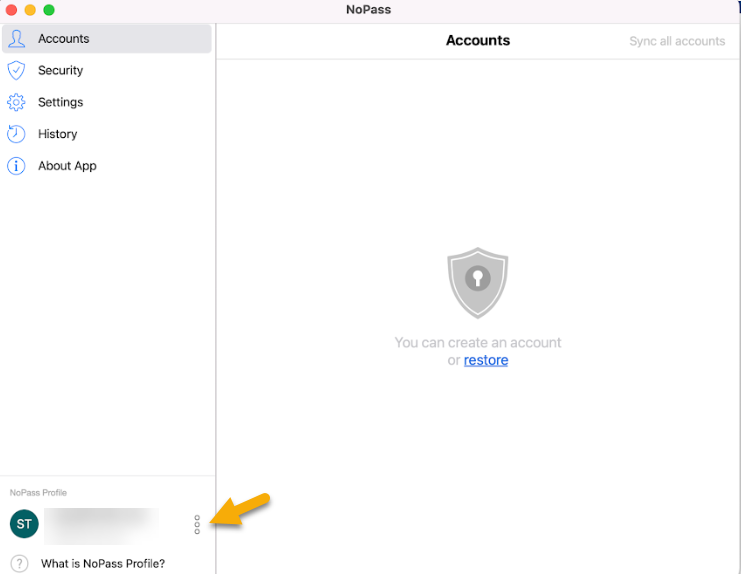
1. Open the NoPass™ application on your macOS computer. Navigate to your profile and click the kebab menu next to it.
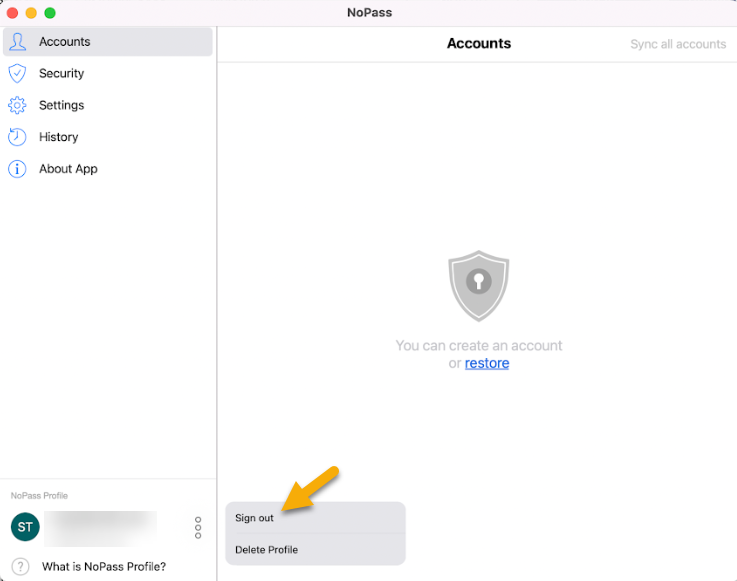
2. In the following menu, click Sign out.
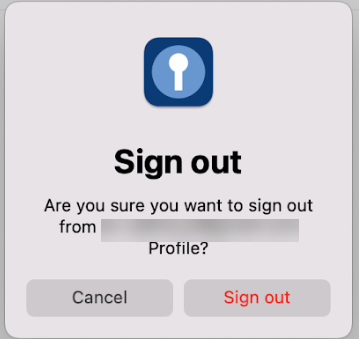
3. In the following dialogue box, click Sign out.
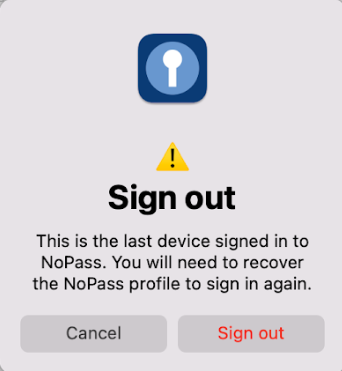
3. If you have no other devices with your profile registered, the following notification shall be displayed. To confirm your action, click Sign out.
4. After you have successfully signed out from your profile, it is no longer shown on your Accounts page.
delete your profile from your nopass app
To delete your NoPass™ profile, perform the following actions.
Procedure
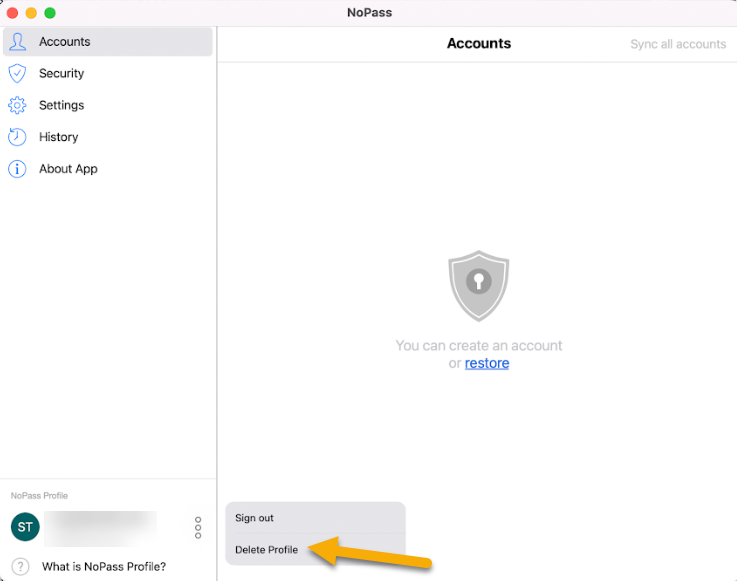
1. Open the NoPass™ application on your macOS computer. Navigate to your profile and click the kebab menu next to it.
2. In the following menu, click Delete Profile.
2. In the following dialogue box, click Delete.
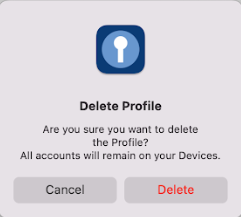
3. Now your Profile is deleted from your NoPass™ application.